This is a new feature which came with iOS 4.3. First make sure you got this version or newer. Enabling the feature isn't that hard actually, and it enables you to share your internet connection on a wireless connection (wifi) so others can use your phones internet connection.
Just go to your phones home screen, go to settings, and then select "Personal Hotspot". Tap "Wi-Fi password" and set a good password, next tap the "Personal Hotspot" switch to enable it, and you are done.
Now there will appear a new Wireless Network which you can connect to on other devices and you got an internet connection.
Showing posts with label howto. Show all posts
Showing posts with label howto. Show all posts
Friday, January 14, 2011
Thursday, May 21, 2009
UUID, Fstab and Automatically mount USB Drive
Finally found a solution on how to make my Linux (Debian):
A) Remember the unique USB drive(in my case a Western Digital Mirror Edition), and where to mount it
B) Automatically mount it when connected
First you have to identify your usb drive, make sure it is connected and you know the device name, in my case:
NoMore:/home# blkid /dev/sdc1
/dev/sdc1: UUID="6494BFE994BFBC3C" LABEL="My Book" TYPE="ntfs"
NoMore:/home#
As you see my drive has a unique ID. This is what we are gonna use in fstab instead of the device name. Smart huh? :) This way we avoid the problem of changing device names when plugging stuff in and out.
Next in fstab, make a line like this:
UUID=6494BFE994BFBC3C /home/user/DiSK/ ntfs-3g defaults,auto,umask=000,users,rw 0 0
Make the changes you need, but make sure you use your correct UUID(and remove the "") and it is set auto like above.
Next check if it works by typing:
mount -a
The -a parameter means it shall mount everything set to auto in fstab. If it works, umount your drive and let's continue:
Ok, make sure you got udev installed. This is what's gonna automaticly mount our drives when new ones are detected. Make a new file;
NoMore:/home# nano /etc/udev/rules.d/99-mount.rules
And add the following line:
SUBSYSTEM=="block", run+="/bin/mount -a"
Just make sure it uses the correct path to the mount command.
Next restart udev:
NoMore:/home# /etc/init.d/udev restart
Now unmount(umount) your drive, unplug it and try it out.
Thursday, May 14, 2009
Easy D90 manual
I have found a really great Nikon D90 users guide which I have to recommend to all you other Nikon D90 users and owners online. It's totally free and even exists in PDF with great explanations and illustrations. The D90 was my very first DSLR camera, and I obviously didn't know quite lot on how to use these cameras before I bought this one. The user manual is located right here, and if you just scroll some lines downwards you will find the link to the guide in PDF format.
Oh, and by the way check out my other post about how to get the cheapest D90 remote available.
Oh, and by the way check out my other post about how to get the cheapest D90 remote available.
Tuesday, January 20, 2009
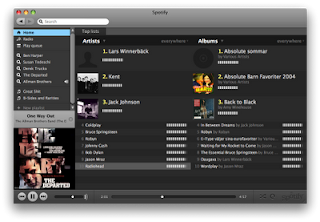
How to get spotify
UPDATE 20. February: Check out my new solutions on how to get spotify accounts by clicking right here.
I will here present you three ways to get Spotify. But first I must say that Spotify is such a GREAT tool in all ways. It's free and legal, and It's great to finally see that the music industry delivers an alternate to pirating. If you like Spotify, support them, and buy an account.
 PS! Spotify works great with Linux as well. Simply install and start it via wine. Here is the instruction for using it with Linux.
Here are three ways to get a free account:
A) Go to http://www.spotify.com/ click "Get started" and submit your e-mail address in the last field. Hopefully they will send you an invite in not to long.
B) Haven't confirmed this one yet, but rumors says it works:
1.) Find a UK proxy, i.e. this one. Enter www.spotify.com as URL, and make sure it wont remove the scripts.
2.) Click "Get started" and enter the proper information. Make sure country is set to "United Kingdom" and postal code "SW1A 2AB".
3.) Submit the information, and let's hope it works :) Hopefully you will get some invites as well..
C) Ask friends who have bought an account to give you an invite. Ask around and you will probably find someone who can help you out. In my own case it was a friend of mine who presented me to spotify, and fixed me an invite from a friend of his who had bought an spotify premium account.
Wednesday, January 14, 2009
Livescribe Pulse Smartpen with Linux
Livescribe Pulse Smartpen is a ballpoint pen with a lot of digital capabilities. But what first caught my attention before even buying one was wether or not it would work with Linux. In this blog post I will keep updating with solutions on how to use it with Linux.
 photo: livescribe.com
So far I have only found one confirmed and working way to use it. This is via Windows virtualization software like VMWare. The biggest problem with this is the fact that VMWare costs money. Another con reported is a little lag when docking the pen to the computer.
Hopefully there will come more solutions on how to use it together with Linux, but sadly it seems to come last in the queue of systems who gets real support for it.
 photo: livescribe.com
Hopefully there will come more solutions on how to use it together with Linux, but sadly it seems to come last in the queue of systems who gets real support for it.
Friday, January 9, 2009
Adding battery info to conky
First find your battery status:
ls /proc/acpi/battery
Then find which of the dirs listed contains the information for your battery. simply "cat" each /proc/acpi/battery/****/info file, and see which contains any information.
To add to your .conkyrc file, simply edit and add the variables you want. Here are some samples:
All the variables can be found here.
ls /proc/acpi/battery
Then find which of the dirs listed contains the information for your battery. simply "cat" each /proc/acpi/battery/****/info file, and see which contains any information.
To add to your .conkyrc file, simply edit and add the variables you want. Here are some samples:
${battery_bar C1B5}
${battery_percent C1B5}
All the variables can be found here.
Sunday, January 4, 2009
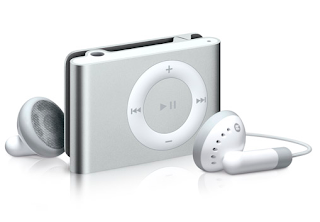
Using the 2GB iPod Shuffle with Linux
Updated 25. May 2009:
Changes:
- Added fstab identifying by UUID
I spent some time figuring out how to do this, but finally found out how it all worked and what had to be done in order for it to worker properly. I am running Debian Testing.
 General setup
1.) You need a package called gnupod-tools. If you are running debian as me, install them like this (as root):
apt-get install gnupod-tools
I am also in favor of using a graphical user interface, in my case Amarok.
apt-get install amarok
2.)
Next we are going to add you ipod to your fstab. Here are two methods, the first(Method A) and BEST one is identifying your ipod by UUID. This will save you a lot of problems:
Method A:
First find your players UUID, type
blkid /dev/sdb
This will give you your players UUID. Make sure /dev/sdb is the correct location of YOUR player. Next enter root mode and edit your /etc/fstab:
UUID=YOUR-UUID /mnt/ipod vfat sync, users, auto,umask=000 0 0
Method B:
As root edit your /etc/fstab and add the following line:
/dev/sdb /mnt/ipod vfat sync,user,noauto,umask=000 0 0
Make sure the /dev/sdb is the same as the one your ipod will be discovered as when connecting and create the /mnt/ipod dir. (mkdir /mnt/ipod)
3.) Now connect your ipod shuffle and mount it like this:
mount /mnt/ipod
3.) Delete everything on it
cd /mnt/ipod
rm -rf ./*
and let's make the file system with gnupod:
gnupod_INIT -m /mnt/ipod
Your ipod should now be ready to start adding music on. From here on you can either add them manually in bash or via Amarok. I will teach you how to do both.
Adding music to ipod shuffle in bash
This is pretty easy. All you have to do is use the gnupod_addsong command like this for every tune you want to add:
gnupod_addsong -m /mnt/ipod/ /home/user/My_Music/my_tune.mp3
After you have done this you have to build the library on your ipod by simply typing:
mktunes -m /mnt/ipod/
And eject it properly:
umount /dev/sdb
eject /dev/sdb
Your ipod shall now work properly.
Adding music to ipod shuffle via Amarok
Start up amarok, it shall now find your ipod automaticly. If it doesn't go to "Settings->Configure Amarok" and select "Media Devices". If there is no devices listed click "Autodetect Devices" and your /dev/sdb shall now appear. Now choose to use the "Apple iPod Media Device" plugin for this device. Click Apply and OK. Click the devices button on bottom left. Select the ipod shuffle device, and connect. Add music by dragging it to the list on the left, right click and press "Start transfer" to transfer the music. When you are done quit Amarok, and go into bash and build the ipod library by typing:
mktunes -m /mnt/ipod/
And eject it properly
umount /mnt/ipod
eject /mnt/ipod
Tips 1:
To tweak Amarok and make it easyer to use later, try this:
First let's make a new binary which incorporates a couple of commands when disconnecting. Enter root mode, and edit /usr/bin/ejectpod
Enter the following:
mktunes -m /mnt/ipod
umount /mnt/ipod
eject /mnt/ipod
Save and exit. Chmod /usr/bin/ejectpod to 755:
chmod 755 /usr/bin/ejectpod
Enter Amarok go to Devices and click the configure device button up right next to transfer. As post-disconnect command enter:
/usr/bin/ejectpod
As Pre-connect command enter:
mount -a
OK, and you are ready. Now amarok should hopefully automaticly build the new databases and unmount the ipod when clicking disconnect.
And you are done!
Monday, December 29, 2008
How to set background wallpaper in Fluxbox
Fluxbox is way faster then both KDE & Gnome, but on the other hand it can be a bit more tricky to configure since there are no decent graphical user interfaces to help you do this. Setting a new background wallpaper on your fluxbox isn't quite that hard if you follow these easy steps.
1.) Open up a terminal. Personally I prefer xterm.
2.) Now you need to edit the startup file for fluxbox. I prefer using the editor called nano. Simply type "nano ~/.fluxbox/startup", and you will jump into your nano text editor.
3.) Look for a line starting with fbsetbg. If there is a "#" at the start of the line, remove it.
4.) If there is none add one like this: "fbsetbg -f /home/user/.fluxbox/wallpaper.jpg".
5.) Place your wallpaper in the location you just specified.
Friday, December 26, 2008
How to clean your fridge and freezer
Some days ago I had to clean out my fridge and freezer. It took some time, but it became pretty nice and clean afterwards. Here is my fast "clean your fridge & freezer howto" :)
 Fridge:
1) Turn off the power.
2) Take everything out. Take a freshness check, and throw everything your dont need. Take a piece of paper and clean off bottles with oil, sauces etc if they have been leaking.
3) Take out all drawers, shelvings and everything else that can be taken out.
4) Clean the fridge. Do not use HOT water. I used some sort of MrMuscle/Jif etc. spray, and at the end a final wipe with a clean paper and water.
5) This one is more of a tip:
Has your fridge been leaking water lately? Then it's probably because of the drainage pipe which has managed to get closed by dirt. It's simple to fix. The drainage pipe is usually located in the back inside of your fridge. Find something which is slim and long and try to stick it through. I used a paper clip which I folded out. After cleaning the pipe take a look at the back of your fridge and remove the dirt. (The drainage pipe is for letting the water out into some sort of holder in the back, which heats it up and makes it vaporise. Smart huh?:) )
Freezer:
I only have a small freezer located on the top of my fridge, so it did not thing it would be such a job. But here's a fast how-to:
1) Turn of the power.
2) Find somewhere to store the food. I simply put it outside in my car since it was several minus degrees celsius. You can use a cooling bag or put it under a carpet or something. A tip could be to freeze some 1,5L bottles with water the day before so it better keeps cool.
3) Make some bowls with HOT water and but it inside the freezer and shut it. This makes everything cool up pretty fast.
4) Take out all the ice/snow. A finger tip rule might be to clean out the freezer when it becomes more snow/ice then a pencil thick.
5) Clean it out like you did with the fridge.
6) Turn on power, and put everything back in :)
PS... Make sure to check your fridge and freezers manual in case it needs special cleaning procedures.
Congrats, you are done! :)
Subscribe to:
Posts (Atom)